Adding Products to the Invoice:
Log in to your InvoiceQuick account and navigate to the "Invoices" page.
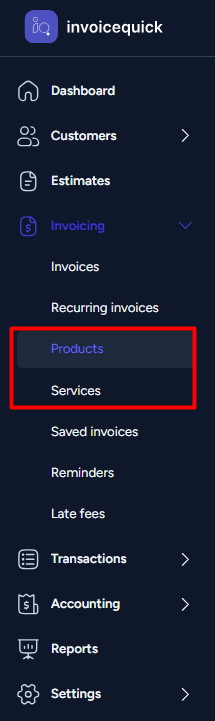
Click on the "Products" tab.
Once on the "Products" page, you'll see a list of existing items (if any). To add a new item, click on the "Add new" button, often located in the top-right corner of the page.

A new form will appear for you to enter the item details.
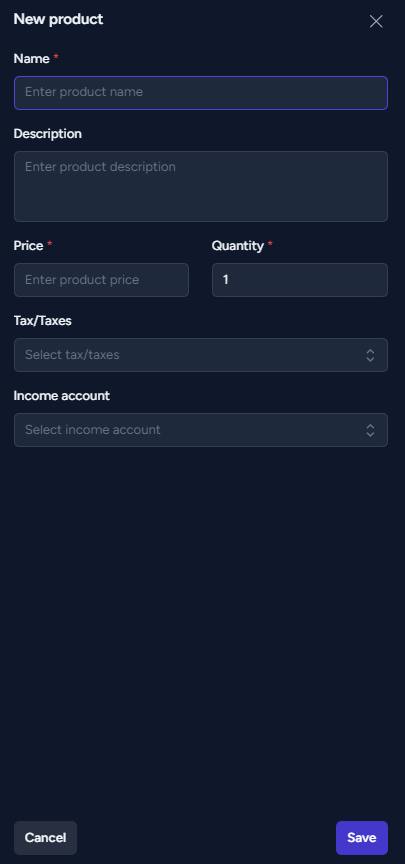
In the provided fields, enter the following information:
1. Product Name: Give a descriptive name to the item.
2. Description (Optional): If needed, provide additional details or a brief description of the product.
3. Price/Rate: Input the unit price or rate of the product.
4. Quantity: Enter the quantity of the product you wish to include in the invoice.
5. Tax: Choose the applicable tax for the product. This can be VAT, sales tax, or any preset tax you have configured.
6. Income Account: From the dropdown menu, select the appropriate income account for the product. This helps with accounting and tracking revenue streams. Options may include "Interest Income," "Printing Income," "Unassigned," "Product or Sales Service," "Software Income," etc.
After filling in all the necessary information, click the "Save" button to add the product to your InvoiceQuick database.
Adding Services to the Invoice:
From the InvoiceQuick dashboard, go to the "Invoices" page.
Click on the "Services" tab.
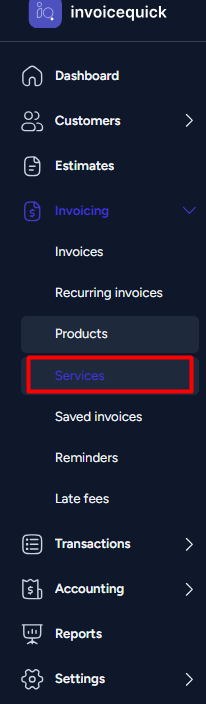
On the "Services" page, you'll see a list of existing tasks (if any). To add a new task, click on the "Add New" button, typically found in the top-right corner of the page.

A new form will appear, allowing you to input the service details.
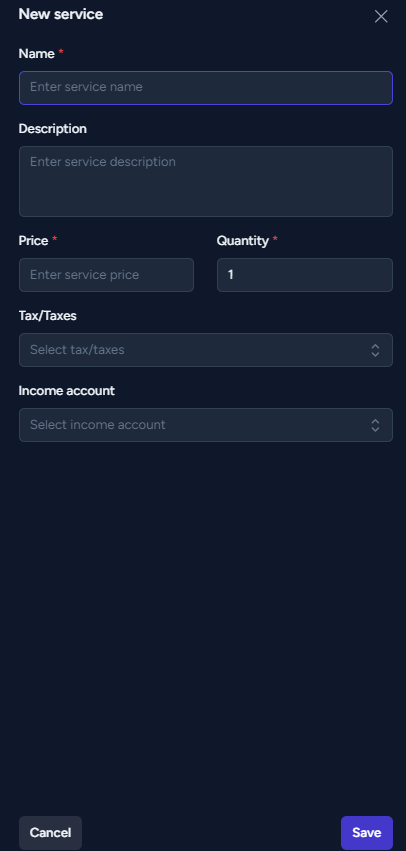
Fill in the following information in the provided fields:
1. Service Name: Enter a name or title for the task.
2. Description (Optional): Optionally, provide additional details or a brief description of the service.
3. Price/Rate: Input the rate or price per unit of the service.
4. Quantity: Specify the quantity of the service that needs to be invoiced.
5. Tax: Choose the applicable tax for the service. This could be VAT, sales tax, or any preset tax you've set up.
6. Income Account: Select the appropriate income account from the dropdown menu. This helps categorize the service for accounting purposes. Options may include "Interest Income," "Printing Income," "Unassigned," "Product or Sales Service," "Software Income," etc.
Once you've provided all the required information, click the "Save" button to add the service to your InvoiceQuick database.
Congratulations! You have successfully added products and services to your InvoiceQuick invoicing software. You can now include these products and services in your invoices to streamline your billing process.