How to change or edit a customer from the invoice main tab
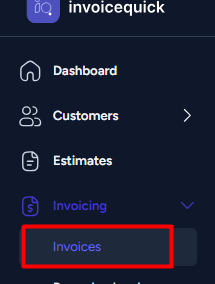
Access the Invoice Page:
- From the sidebar, click on "Invoices" to access your list of invoices.
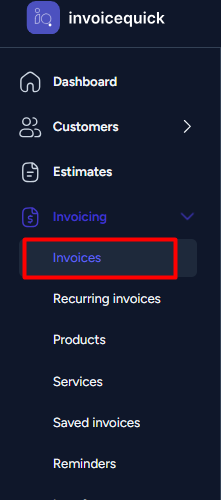
Select the Invoice where you want to edit the customer:
- Locate the invoice associated with the customer you want to edit. click on the three dots (...) option that indicates additional actions.

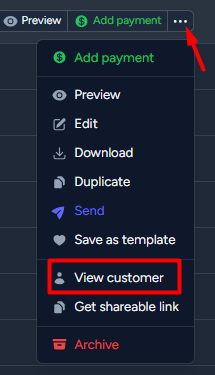
Choose "View Customer":
- From the dropdown menu that appears, select "View Customer." This action will take you to the customer's dedicated page.
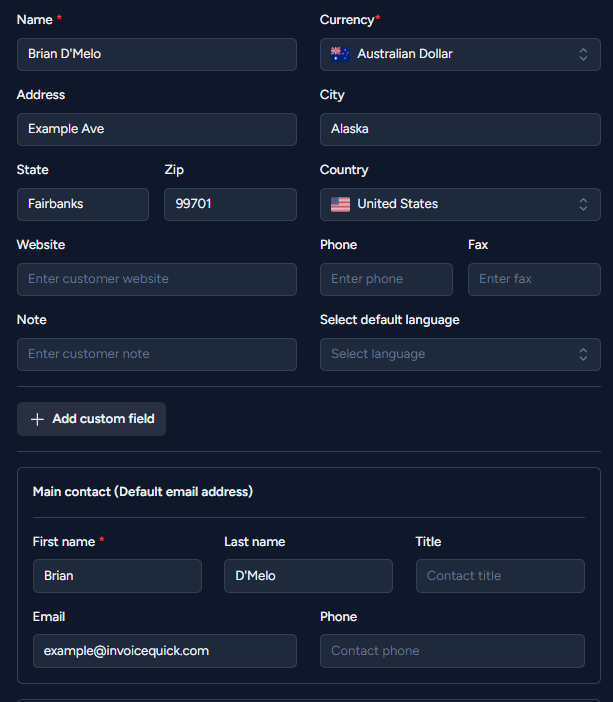
Edit Customer Information:
- On the customer page, you will see details about the selected customer, including their name, contact information, and any additional information you've previously entered.
Initiate Editing:
- To make changes to the customer's information, click on the "Edit Customer" option.

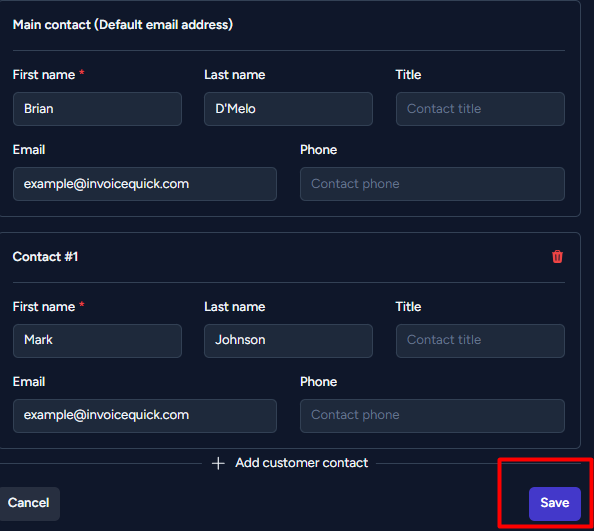
Edit Customer Form:
- After clicking "Edit Customer," a form will pop up, allowing you to modify any field related to the customer's information. This may include their name, address, email, phone number, and other relevant details.
Make Changes:
- Update the fields you wish to change. You can modify customer details such as their name, address, contact information, or any other relevant information.
Save Changes:
- Once you've made the necessary edits, be sure to save the changes. Look for a "Save" button on the edit customer form and click it.
Confirmation:
- You should see a confirmation message indicating that the customer's information has been successfully updated.
Return to Invoice Page:
- Close the customer edit form, and you will be returned to the invoice page.
Updated Customer Information:
- Now, the invoice is associated with the updated customer information you've just edited.
How-to Change a Customer from the Invoice Edit tab:
Access the Invoice Page:
- From the sidebar, click on "Invoices" to access your list of invoices.
Select the Invoice:
- Locate the invoice associated with the customer you want to change or edit. Click on the invoice to open it for editing.

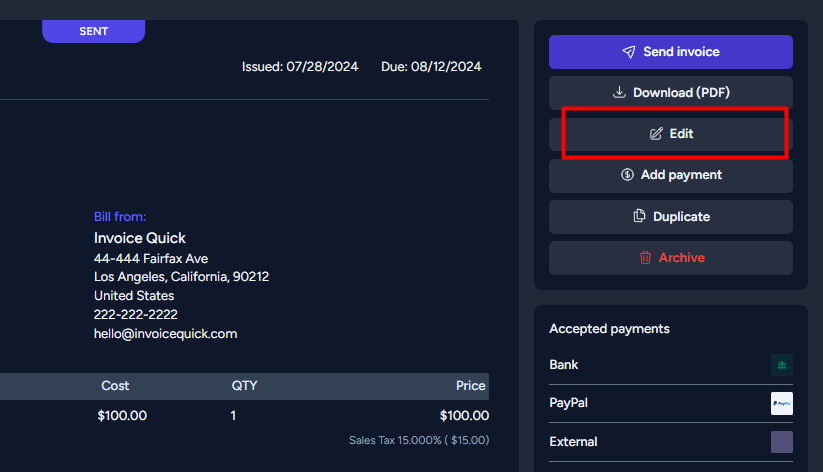
Edit the Invoice:
- Once the invoice is open, click on the "Edit invoice" option.
Access Customer Options:
- After entering the invoice edit mode, look for the customer's name on the invoice details page.
Click on the name
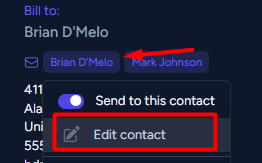
Choose "Edit Contact":
- From the dropdown menu that appears, select "Edit Contact" . This action allows you to modify the customer associated with the invoice.
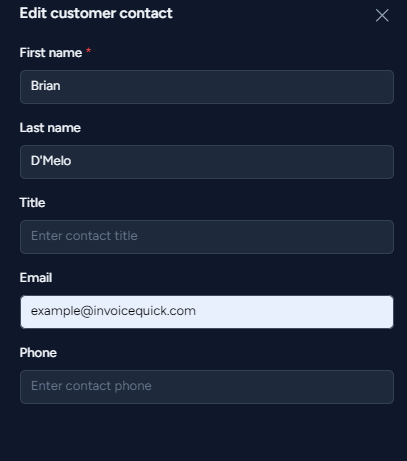
Edit Customer Information:
- A form will appear, allowing you to either select an existing customer or create a new one. If you want to change the customer, choose an existing customer from the list.
Confirm Changes:
- After selecting the customer or making any desired changes, confirm your choice. This will update the customer associated with the invoice.
Save Changes:
- Be sure to save the changes by clicking a "Save" button, found at the bottom of the form.
Return to Invoice Page:
- Close the customer edit form, and you will be returned to the invoice edit page.
Updated Customer Information:
- The invoice is now associated with the updated customer information you've chosen or edited.