Go to the Recurring Invoicing page from the left menu.

Click on the Add new button to start creating a new recurring profile.

Select a customer for whom you want to create the recurring invoice. If the customer is not in the system, you can create a new customer.

Set up the recurring invoice just as you would a regular one.

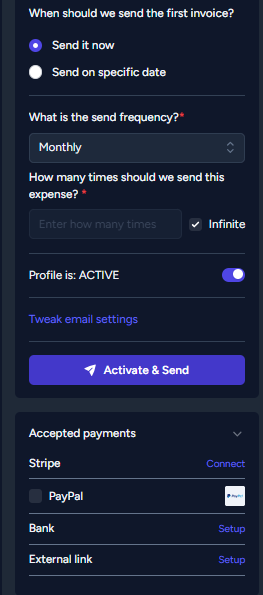
On the top right corner, choose whether you want to send the first invoice immediately or schedule it for a later date.
-
- If you select Send on specific date, enter the desired send date (default is today).

- If you select Send on specific date, enter the desired send date (default is today).
Next, specify how often you want to charge the customer, such as monthly, quarterly, or annually.
Determine the duration for which the invoices will automatically send. If you select the Infinite checkbox, the invoices will continue to be sent until you manually deactivate the status or delete the recurring profile.

Choose the preferred payment acceptance method for the recurring invoices.
Before saving the profile, ensure that the status is set to ACTIVE.
Once everything is set, you can activate and schedule the recurring profile.
In the below video, you can find more details about Recurring invoices.
By following these steps, you can easily create a recurring invoice profile in InvoiceQuick. This feature enables you to automatically bill customers the same amount on a regular basis, saving time and streamlining your invoicing process.