Here's a guide on how to export expenses in InvoiceQuick:
-
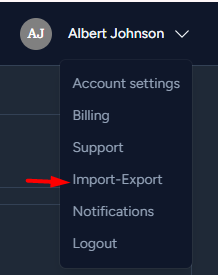
In the top-right corner of the dashboard, click on your profile or account settings.
Access Imports and Exports:
- Export Expenses:
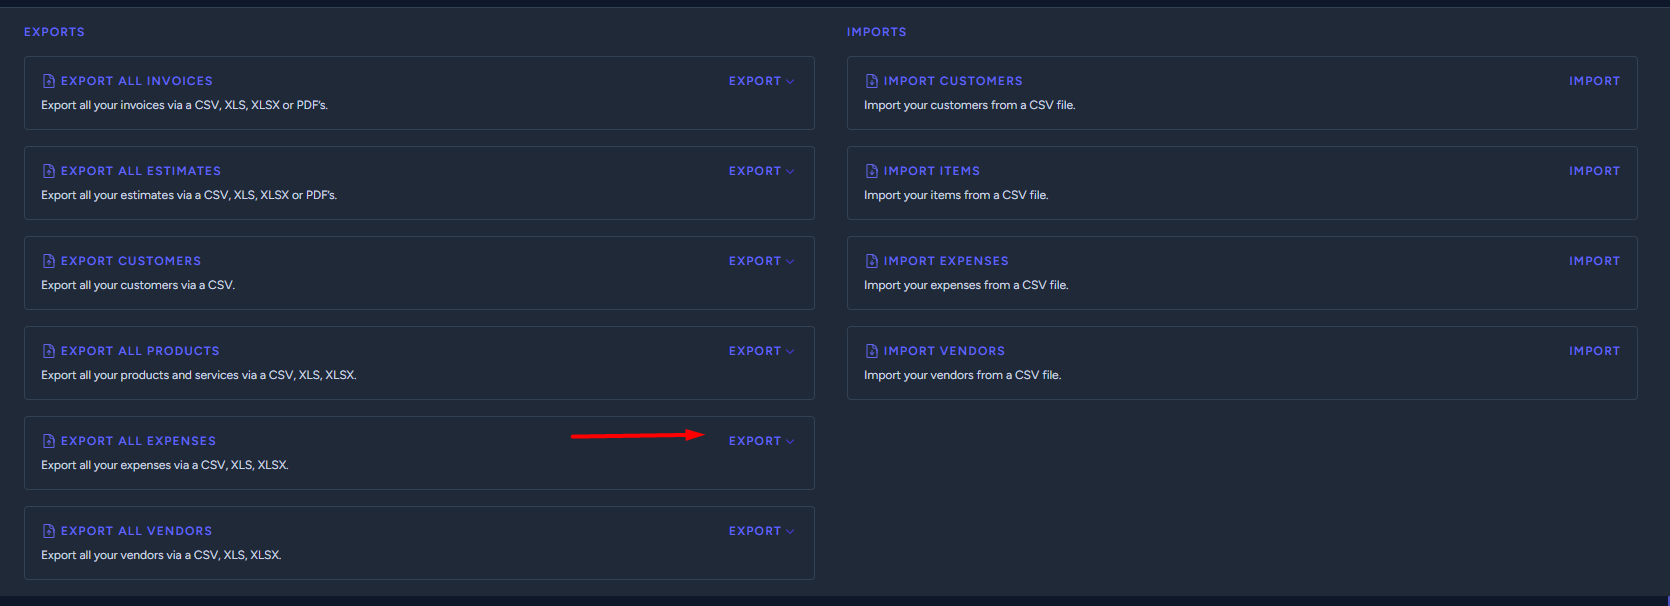
- To export your expenses, look for a button EXPORT that allows you to "Export all expenses as CSV," "XLS," or "XLSX," depending on your preference.
-
Click on this option to initiate the export process.
Download the Exported File:
- After initiating the export, the system will generate a CSV, XLS, or XLSX file containing all your expenses.
-
You will be provided with a link to download this file.
Review and Use:
- Open the exported file using the appropriate software (e.g., Excel for XLS or XLSX, or a spreadsheet program for CSV).
- Review and utilize the exported expense data as needed.