Here's a guide on how to import items in InvoiceQuick:
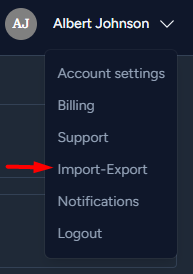
Click on Your Profile:
-
In the top-right corner of the dashboard, click on your profile or account settings.
Access Import and Export Tab.
- Import Items:
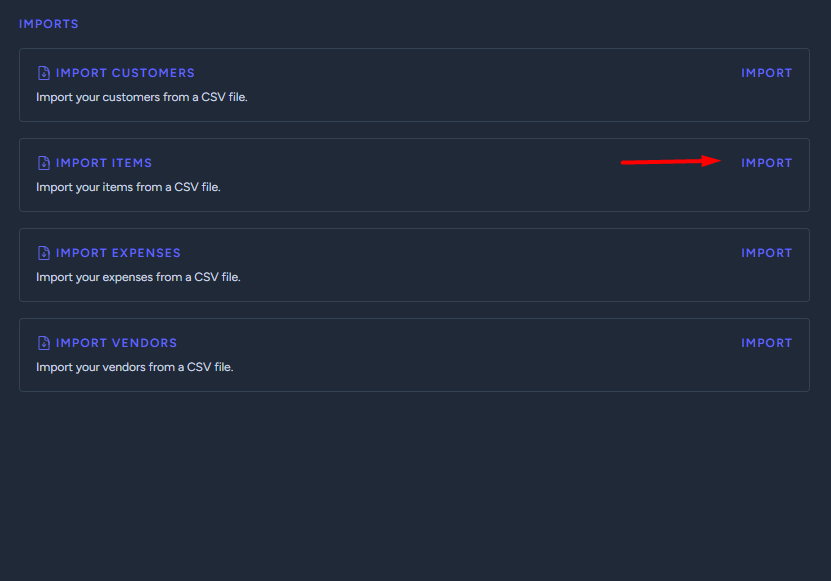
- To import your items, you should see a button to "Import" your file in either csv, xls, xlsx.
-
Click on this option to start the import process.
Choose your File:
- You will be prompted to choose the file containing your item data.
-
Locate the file on your computer and select it for upload.
Mapping Fields:
- The system may ask you to map the fields in your to the corresponding fields in InvoiceQuick.
-
Follow the on-screen instructions to map the fields correctly.
Confirm and Initiate Import:
- Once you've mapped the fields, confirm your choices and initiate the import.
-
The system will process your file and import the item data.
Review and Use:
- After the import is complete, review your items to ensure they have been added correctly.
- You can now use these items when creating invoices or estimates.